Orchids are diverse, beautiful and fascinating flowering plants, famous for their intricate and colorful blooms. As orchids with air roots, are known as aerial roots, often epiphytic, which means that they don’t grow in soil but on surfaces such as rocks or trees.
If you are in need of repotting an orchid then this article telling you all about ‘how to repot an orchid with air roots’. It may be a bit intimidating task, as the air roots it has, play a very crucial role in its growth and adaptation to its environment.
Table of Contents
- What this Article is all about
- What Are Orchid Air Roots?
- Why and When to Repot an Orchid with Air Roots?
- Things to Consider Before Repotting
- Tools Required for Repotting of Orchid with Air Roots
- How to repot an orchid with air roots - Step by Step
- a). Soak the orchid before fresh repotting
- b). Remove the orchid from the pot
- c). Examine the orchid and cut the dead and rotting roots
- d). Prepare the new pot
- e). Place the orchid in the new pot
- f). Fill the pot with growing medium
- g). Give the orchid right conditions to grow
- h). Resume the regular routine care
- Some Mistakes to Avoid after Repotting Orchid
- Conclusion
- Frequently Asked Questions
What this Article is all about
If you don’t know how to repot an orchid with air roots, but need to get your orchid repotted as well, then, there is nothing to worry about. You can do it easily if you have the right guidance and knowledge, this is what we have created this article for. A good understanding as well as caring for the unique characteristics of the orchids with air roots is very important and essential for cultivating these fascinating plants successfully.
This article is aimed to provide you with the complete guidance for the repotting process of an orchid with air roots, for each step from start to finish, including the tools required and tips to ensure the effective repotting.
Related Article: How to Propagate a ZZ Plant
What Are Orchid Air Roots?
Orchids with air roots are epiphytic, and the air roots play an essential role in their nurture and growth. Aerial roots’ grow and flourish outside of the potting material, above the ground unlike the traditional roots that get moisture and nutrients from the soil they are buried in.
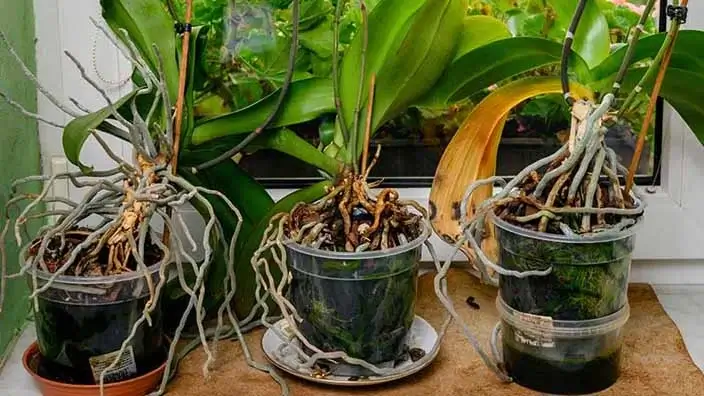
Air roots are helpful in absorbing moisture and nutrients from the air. The outer layer of aerial roots have a specific structure, making it adapted to absorbing moisture from the atmosphere, which becomes necessary, particularly in tropical regions with higher humidity.
Additionally, air roots also help in anchoring the orchid to its host surface. They are often silvery or greyish in appearance and a protective layer, known as velamen, covers them which is helpful in preventing water loss. They may have a wiry or fizzy look.
Why and When to Repot an Orchid with Air Roots?
Before we move on to the step by step process of repotting an orchid with air roots, it’s important to know why does an orchid with air roots need repotting and when should it be repotted.
When an orchid with air roots remains for long in a pot, it may loose its vigor and get its growth slowed down for which there can be various factors responsible. Thus, it becomes important to repot the orchid for the following reasons:-
1. Repot an orchid with air roots to give fresh Growing Medium
With the passage of time, the growing medium in which the orchids are planted can become compacted and break down, loosing its ability to provide enough air required for proper growth. Here, repotting becomes important because it allows you to get fresh medium for the orchid, which lets its roots get proper drainage and air.
2. Repotting an Orchid with air roots to Prevent Diseases
Like many other plants, orchids are also open to the danger of getting diseases as there can be pathogens in the old decaying growing medium. When you repot an orchid with air roots, you get the opportunity have an inspection of the roots, where, if you find some decaying or rotting parts, you can remove them, thus reducing the risk of infections.
Additionally, there is possibility of dehydration and damage to the air roots, and repotting provides you with the opportunity to properly inspect the roots and cut any dead or unhealthy parts, allowing the new, vigorous roots to grow.
3. Adjustment of the Pot Size
The role of the pot size in the proper growth of the orchids can’t be ignored. Though orchids can grow in snug conditions, but with the passage of time, they grow enough that the accommodation of their expanding roots system in the pot becomes difficult and they consequently outgrow their current pots. Thus, through repotting, you can move an orchid to a larger pot if required for its effective and healthy growth.
4. Renew Nutrient Supply to the old orchid
It’s the growing medium that orchids extract their nutrients from, but with the passage of time, the nutrients in the existing growing medium begin to deplete and the medium doesn’t remain nutrients-rich anymore. That’s why the new, fresh and nutrients-rich growing medium allows the orchid to get the essential elements for a healthy and effective growth.
5. Enhance Overall Vigor of the orchid by repotting
Regular repotting is good for the overall health and vigor of the orchid because it is a good way to promote a healthier root system, and a healthy root system guarantees robust foliage and lively flowering.
Things to Consider Before Repotting
Keep in mind that when you are repotting your orchid, make it sure that it’s the exact and proper for its repotting, which is when its lower leaves are dead and its beginning to grow new leaves at the top; the stem looks week ; and the roots have begun to grow and flow over the pot.
Avoid repotting your orchid when it is on its bloom because if you do so, the orchid will loose its flowers. Additionally, its better to repot an orchid with air roots within a span of two years, but make it sure that while repotting, you handle all the roots properly and gently so that they don’t get damaged.
Tools Required for Repotting of Orchid with Air Roots
Now, you have a pretty good idea of the importance of repotting an orchid with air roots and the right time to do it. Once you have made up your mind to repot it, you will need some necessary tools and materials to get your desired results in the form of a new growing and vigorous orchid with aerial roots.
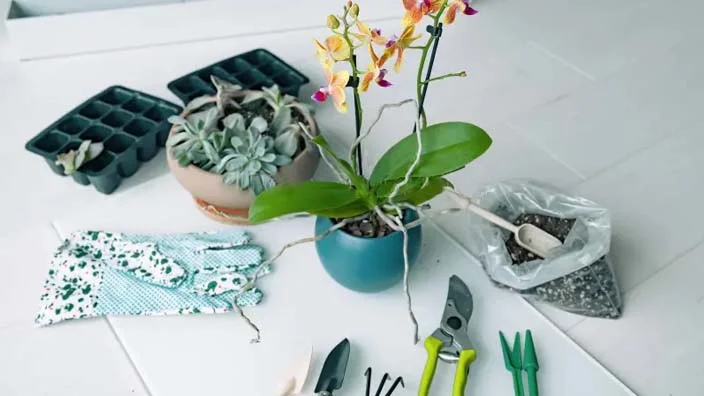
Get in hand the following materials and tools before you begin the repotting process:-
New Pot or Container
Though it may seem surprising, but orchids with air roots grow well in narrow spaces. However, it is better to use another larger pot for your grown orchid which provides enough space for the roots to grow and allows them to expand, but it should not be large enough as well.
Using a larger pot is also better because as the orchid grows, the soil available in the existing pot may not suffice for the roots that grow enough to get tightly tangled overtime. Thus, get a pot two or three inches wider than the previous one, and a clay pot is preferable to the one made of plastic because they are better for drainage.
Orchid Growing Medium
Another important material you will need is a well-draining growing medium. You can buy a commercial potting mix which is specially made for orchids. If you want to do it yourself, you’ll need to make a combination of materials, like, fir bark, sphagnum moss. Keep sphagnum moss and bark in a 1:5 proportion or get the sphagnum moss replaced with one part charcoal and one part sponge rock. The mix should provide good aeration for the roots.
Small wooden dowel or bamboo sticks
You’ll need small tools like wooden dowel or bamboo sticks to carefully remove the old growing medium from around the roots, without damaging them.
Clean, Sharp Scissors or Pruners
In order to trim the dead or unhealthy roots, you will need sharp scissors or pruners, sterilize them beforehand to prevent the spread of any untoward conditions.
Water bucket or sink
You will need a water bucket or a sink for soaking and removing any clinging old growing medium from the orchid’s roots that are inside the growing medium.
Use of Gloves to repot orchid with air roots
Orchid roots are sensitive, especially air roots, you will need to wear gloves to protect your hands and the orchid while repotting it.
How to repot an orchid with air roots - Step by Step
Once you have all the necessary materials and tools needed for repotting, the next thing you have to do is step by step repotting of the orchid. It’s very easy and simple, just follow the steps and instructions we are going to share with you to avoid any damage to the plant:-
a). Soak the orchid before fresh repotting
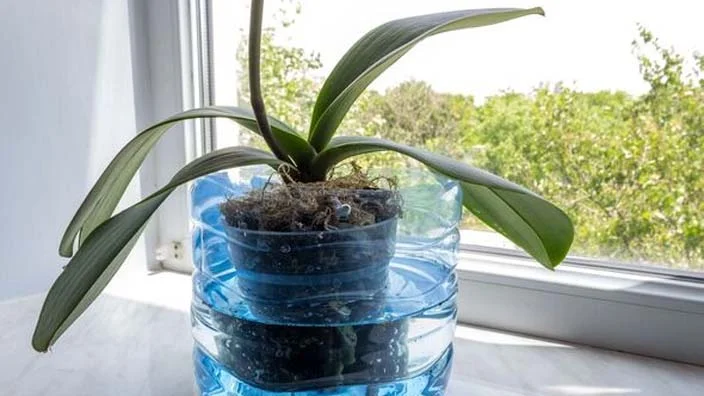
The very first thing you have to do is filling the sink or bucket you have with cool, but not cold, water. Then, place the pot, in which the orchid is planted, into the bucket or sink to soak it, so that the old medium can be removed from around the roots of the orchid without damaging them. Keep the pot into the bucket for approximately 30 minutes for soaking.
Next, get the pot out of the bucket or sink and drain any excess water.
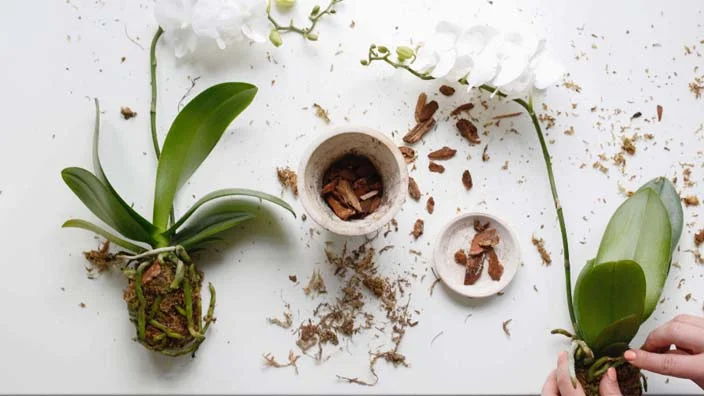
b). Remove the orchid from the pot
Once you have drained water from the pot, the next thing to do is removing the orchid with air roots from its pot. To do this, use your fingers to clasp the orchid right at its base, under its lowest leaves and jiggle it gently when you are pulling it upwards in order to loosen it and all its roots from the growing medium.
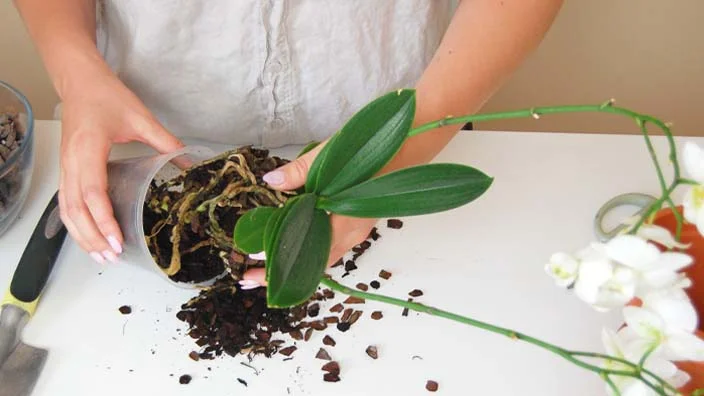
As the planting material will be loose after soaking, you can dump out this material by turning the pot over while still grasping the orchid in your fingers.
After removing the planting material from the pot, gently and carefully ease any of the remaining roots through the openings, if it has, in the pot, and don’t try to bend the roots as their tips would be fragile and there is a risk of their getting broken. Thus, you have to avoid bending them. Once you have freed all the roots, get the orchid out of the pot.
c). Examine the orchid and cut the dead and rotting roots
In this step, you need to properly examine the orchid whether it has any dead or partly-dead roots which need to be removed because they are of no use and just take up space.
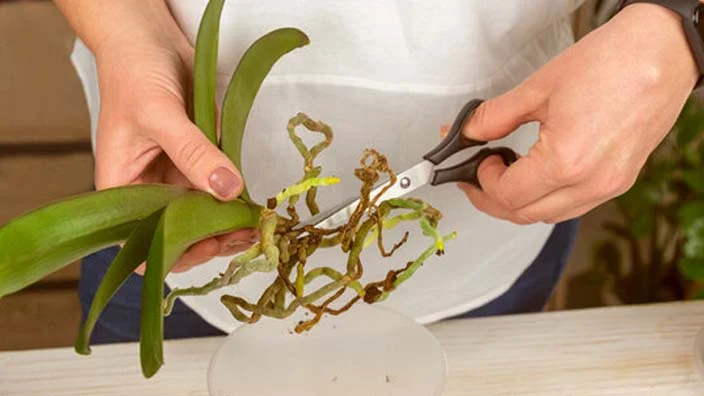
You can figure it out by examining the color of air roots. Healthy aerial roots have naturally various colors, and may be found in a silvery gray color or in green with a bit swollen dark green tip.
Look for the roots that are dry, mushy, or have a brown or shriveled appearance, and remove them with sterilized pruners or scissors. Cutting off unhealthy roots may give the healthy aerial roots air to breath when they grow.
d). Prepare the new pot
As mentioned before, you can reuse the same pot as well, however, it is better to use another larger pot for your grown orchid which provides enough space for the roots to grow and allows them to expand, but it should not be too much large.
Additionally, clay pot is preferable to the one made of plastic because they are better for drainage. To improve drainage, you can also make a shallow layer of pebbles or broken pot pieces in the new pot.
e). Place the orchid in the new pot
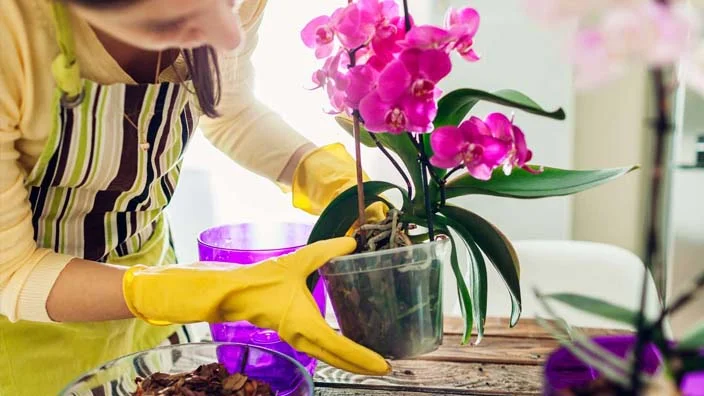
Next, you have to place the orchid in the pot in a way that you gently ease the aerial roots into the natural positions they want to grow, and don’t bend or compress the roots so that they don’t get damaged. You can also ease some roots through the additional holes in the pot is it’s needed for their natural growth position.
f). Fill the pot with growing medium
Make it sure that you add the suggested mounts of fie bark and sphagnum moss which is 5 parts bark and 1 part sphagnum moss. Use the small wooden dowel or bamboo stick for snugging the bark around the roots, so that it is properly spread into the pot and the roots get anchored well. Don’t pack the bark into the pot too tightly. Put enough bark followed by sphagnum in the pot that the bottom roots get covered but not the foliage.
If you are not sure what to be done with aerial roots, keep in mind that it’s better that they are above the soil, and if mistakenly you bury some air roots into the growing material, fear not. The plant will carry on its growth though after an adjustment period.
g). Give the orchid right conditions to grow
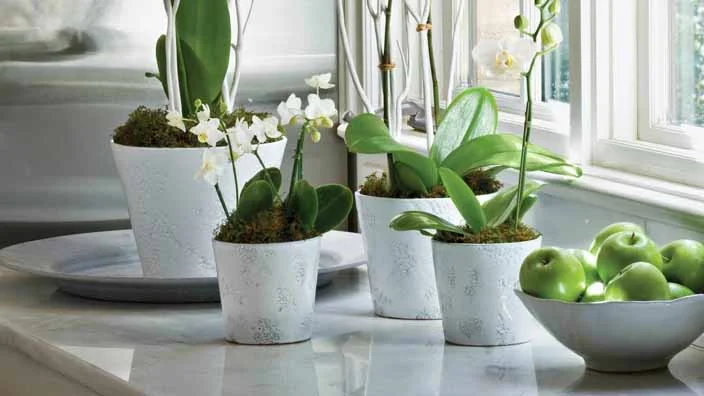
Once you have repotted the orchid, make it sure that you give the right conditions to grow, avoiding transplant shock. It’s better to keep the orchid in a cool location where there is good air circulation, bright, indirect sunlight, and abstain from watering it for several days, even up to a week.
h). Resume the regular routine care
When you see that the orchid is showing signs of renewed growth, restart the regular routine maintenance and care. You’ll see new growth in the form of new leaves or new air roots.
Some Mistakes to Avoid after Repotting Orchid
Repotting orchids is important and essential to their healthy and renewed growth, and preventing issues, like root rot. But, it’s also crucial to have some idea of to-dos after repotting.
If you see your plant dying, better judge the situation promptly and consider the appropriate measures to address the issues affecting its health:-
No Over-watering while repotting orchid with air roots
Avoid making a mistake of over-watering your orchid after repotting it. Fungal diseases of root rot may occur as a result of watering the orchid more than needed.
Exposing to the direct sunlight
As already mentioned, after repotting, place your orchid in a location where it gets bright, indirect sunlight. Exposing the orchid to direct sunlight may harm it as it may be experiencing some stress after repotting.
Fertilizing too soon
There is no doubt that fertilizing is also part of orchid care. However, after repotting, give the plant some time to recover. Fertilizing it too soon can lead to root burn, hindering the plant to establish new healthy roots.
Conclusion
To sum it up, how to repot an orchid with air roots after certain time is good for it’s renewed and healthy growth, as repotting allows you to give provide the plant a new growing material, more space to expand its roots in the new larger pot and trim dry and dying roots, and it isn’t that much tough job to do.
You just need to have the necessary materials and tools need to repot an orchid and follow the steps outlined above, to repot and orchid. What is more essential for repotted orchid to have a healthy and renewed growth is the aftercare, which you can do by following the instructions we have provided above. However, we have made effort to apprise you about the significance of repotting orchids with air roots and also the stepwise procedure required to follow for the rehabilitation of the dead roots.
Frequently Asked Questions
Do you bury air roots when repotting orchids?
Aerial roots’ aren’t meant to be buried because they grow and flourish outside of the potting material, above the ground unlike the traditional roots that get moisture and nutrients from the soil they are buried in. Most importantly they are helpful in absorbing moisture and nutrients from the air.
Should air roots be cut off orchids?
If there are any dead or partly-dead air roots, they need to be removed because they are of no use and just take up space. However, healthy air roots aren’t meant to be cut off as they are essential for orchids’ growth and helpful in absorbing moisture and nutrients from the air.
What do I do with long air roots on my orchid?
Healthy air roots aren’t meant to be cut off as they are essential for orchids’ growth and helpful in absorbing moisture and nutrients from the air. However, if there are any dead or partly-dead air roots, they need to be removed because they are of no use and just take up space.
Can you grow a new orchid from aerial roots?
Growing an entirely new orchid from individual air roots may not be possible, or if it’s so, it may years to turn into an independent orchid. Some orchids produce keikis, which are small offshoots and often develop along the stem or at the base of the orchid. Once they grow roots on them and are large enough, they can be separated and grown into independent, orchids.